
Halloween is the perfect time to get creative with candy gifts. From classroom parties and neighborhood trick-or-treating to family gatherings and spooky movie nights, beautifully wrapped sweets can make the celebration feel even more special. While candy is already a favorite Halloween treat, thoughtful packaging adds a personal touch that makes even simple chocolates, gummies, lollipops, and candy bars feel like memorable gifts. The best part is that you do not need expensive supplies or advanced crafting skills to create eye-catching Halloween candy packaging. With a few colorful materials, some imagination, and easy do-it-yourself techniques, you can transform ordinary sweets into ghost-shaped treat bags, miniature pumpkin packages, creepy-cute gift boxes, and festive candy bundles.
Whether you are preparing party favors for children, putting together small gifts for coworkers, or creating handmade treats for friends and family, these creative Halloween candy gift wrapping ideas offer something for every style and budget. From classic orange-and-black designs to adorable monsters and elegant Halloween packaging, there are plenty of ways to make your candy gifts stand out this spooky season.
1. Ghost-Shaped Candy Bags for a Classic Halloween Look
Ghost-shaped candy bags are among the easiest Halloween gift wrapping ideas to make at home. Their simple design works well for classroom celebrations, children’s parties, and small gifts for trick-or-treaters. All you need are small white paper bags or food-safe clear bags, black markers or stickers, ribbon, and individually wrapped candies.
For a paper version, fill a small white bag with candy and fold the top closed. Draw two oval eyes and a small mouth on the front to create a friendly ghost face. You can also use black paper cutouts if you prefer a cleaner, more uniform appearance. Tie the top with black, orange, or purple ribbon to complete the design.
If you want a softer ghost effect, place individually wrapped candy inside a food-safe clear bag, cover the outside with white tissue paper, and gather the material at the top. Secure it with ribbon and add a face to the front. Keep the tissue paper outside the food packaging so that it does not come into direct contact with unwrapped sweets.
These ghost candy bags are easy to personalize. Give each ghost a different expression, attach a small name tag, or use different ribbon colors to distinguish party favors. You can even create a family of ghosts with different sizes for a coordinated Halloween gift display.
2. Mini Pumpkin Candy Packages for Festive Treats
Pumpkins are one of the most recognizable symbols of Halloween, making them an excellent inspiration for candy gift packaging. Their bright orange color creates an instantly festive look, while green ribbons and leaf-shaped decorations add a natural finishing touch.
To make a simple pumpkin candy package, place candy in an orange paper bag or an orange food-safe pouch. Gather the top, fold it neatly, and secure it with green ribbon or twine. Add a small piece of green paper to resemble a leaf, then draw or attach a smiling pumpkin face to the front.
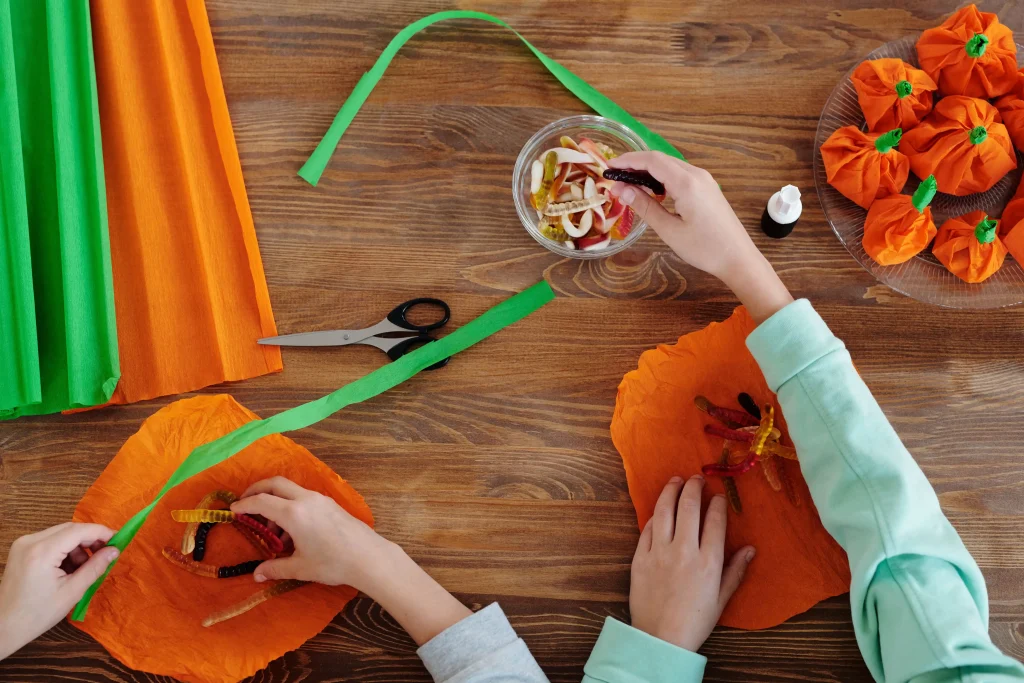
Another option is to use orange tissue paper to wrap a small bundle of individually wrapped sweets. Place the candy in the center, gather the tissue around it, and twist the top to form a pumpkin-like shape. Secure the gathered section with green ribbon. For a more polished result, use two layers of tissue paper and keep the folds evenly distributed around the candy.
Mini pumpkin packages work particularly well for Halloween dessert tables because they can double as decorations. Arrange them in a basket, place them beside cupcakes, or line them along a party table. Guests can take one home after the celebration, making the packaging both decorative and practical.
For a personalized touch, attach gift tags with names, short greetings, or messages such as “A Little Halloween Treat.” This simple detail makes the packages feel more thoughtful without requiring additional crafting time.
3. Cute Monster Candy Wrappers for Kids
Halloween does not have to be frightening. Cute monster candy wrappers are a fun alternative for younger children, especially those who prefer friendly characters over scary decorations. These designs can feature colorful faces, oversized eyes, silly teeth, and playful shapes.
Start with small paper bags in green, purple, blue, or orange. Fill each bag with individually wrapped candy, fold the top, and decorate the front with paper eyes, a mouth, and other monster features. Large adhesive eyes can make the project quicker, while colored construction paper allows you to create different expressions.
You can also transform plain candy bars into little monsters. Wrap each candy bar in colored paper, leaving the original food wrapper intact. Add paper eyes and a mouth to the outer covering, then finish with small paper horns or ears. Avoid covering important product information or removing the original packaging, especially when sharing treats with children who may have food allergies.
For a coordinated party theme, create several monster designs using the same color palette. A collection of silly green monsters, purple creatures, and orange characters can make a candy table feel lively without looking cluttered.
This project is also suitable for a family craft activity. Children can help choose colors and draw faces, while adults handle cutting, fastening, and preparing the food-safe packaging. With a little planning, the finished treats can become both party favors and a fun Halloween afternoon project.
4. Black-and-Orange Candy Gift Boxes for a Polished Finish
If you prefer Halloween packaging that looks stylish rather than cartoonish, black-and-orange candy gift boxes are a versatile choice. The combination feels traditional and festive while offering plenty of room for elegant details.
Small kraft boxes, black paper favor boxes, and orange gift cartons are all suitable starting points. Fill them with individually wrapped chocolates, candy bars, or a selection of assorted sweets. Add orange ribbon to a black box, black twine to an orange box, or a combination of both colors for a classic Halloween finish.
For extra decoration, attach a small paper bat, spiderweb cutout, or crescent moon to the lid. Metallic gold or silver accents can also create a more refined appearance for adult gifts or workplace celebrations. Keep the decorations simple so the box remains attractive without becoming difficult to open.
A small tag can make the package feel more personal. Write the recipient’s name by hand or add a short Halloween greeting. If you are preparing several boxes, use the same style of ribbon and tag to create a consistent presentation.
These candy gift boxes are especially useful when you want to combine several types of treats in one package. They can hold individually wrapped chocolates, caramels, lollipops, and other sweets, depending on the box size. Choose sturdy packaging that can support the contents without bending or tearing, and keep food separate from decorative materials that are not intended for contact with edible products.
5. Spiderweb Candy Wrapping for a Spooky Effect
Spiderweb decorations can turn basic candy packaging into something that looks perfectly suited to Halloween night. This idea is especially effective for dark-colored wrappers, black gift bags, and small boxes filled with assorted sweets.
Begin with a black paper bag or a plain black box. Use white or silver paper to create a spiderweb design, or draw a web directly onto the exterior with a suitable marker. You can also attach a small paper spider to one corner for a finishing detail. If you are using adhesive decorations, make sure they are firmly attached and remain outside the food packaging.
For a simple homemade version, cut a white paper circle or square and draw a web pattern using thin lines. Trim the shape to fit the front of your bag or box, then attach it with glue or double-sided tape. A small black paper spider placed near the web creates a striking contrast.
This design looks particularly good when combined with purple ribbon, silver string, or small bat-shaped tags. It is a practical option for older children, teenagers, and adults who appreciate a slightly more dramatic Halloween style.
Spiderweb packaging can also help tie together an entire party display. Use matching decorations on candy favors, snack containers, and gift bags to create a consistent theme across the table.
6. Halloween Candy Bouquets for a Creative Gift
A Halloween candy bouquet is an excellent choice when you want to give something more substantial than a single treat bag. It combines the appeal of a floral arrangement with the excitement of receiving assorted candy, making it suitable for birthdays that fall near Halloween, office exchanges, family celebrations, and seasonal gifts.
To create a candy bouquet, choose a small vase, sturdy cup, decorative bucket, or Halloween-themed container. Place floral foam or another suitable support inside, ensuring it is secured and kept separate from edible items. Attach individually wrapped candy to food-safe picks or use a suitable candy bouquet holder designed for this purpose. Arrange the pieces at different heights to create a full, balanced shape.
Choose a color scheme before assembling the bouquet. Orange, black, and purple create a traditional Halloween look, while green and purple can give the arrangement a monster-inspired theme. Candy wrappers in complementary colors help the finished gift look coordinated.
You can add lightweight paper bats, miniature pumpkins, or a personalized message card between the candy pieces. Keep non-food decorations away from exposed candy and make sure picks, wires, and sharp ends cannot accidentally contact the recipient.
A candy bouquet can be adapted to different budgets. A small version made with a handful of candy bars and lollipops is ideal for a friend, while a larger arrangement with assorted sweets can serve as a centerpiece or family gift. The container can also be reused after the candy has been enjoyed.
7. Recycled Paper Packaging for Budget-Friendly Halloween Gifts
Creative Halloween packaging does not need to cost much. Reusing suitable paper bags, small cardboard boxes, and leftover wrapping materials can help you create attractive candy gifts while reducing unnecessary waste.
Plain kraft paper is particularly useful because it works with almost any Halloween theme. Draw black cats, bats, pumpkins, or tiny stars directly onto the paper, or use Halloween-themed stamps to create a repeating pattern. Wrap individual candy bars in the decorated paper while keeping their original food wrappers intact.
Small clean cardboard boxes can also be transformed into treat containers. Cover the outside with colored paper, attach a handmade tag, and tie the box with leftover ribbon. If the box previously held food, ensure it is clean, dry, odor-free, and suitable for reuse. Avoid packaging that has contained chemicals or non-food substances.
Another option is to turn leftover gift wrap into decorative sleeves for candy boxes. Measure the box, cut the paper to size, and secure it neatly at the back. Add a contrasting ribbon or paper label to finish the look.
Recycled packaging is especially useful when preparing treats for an entire classroom or a large Halloween party. Buying a few basic supplies and using materials you already have can help keep costs under control without making the finished gifts look plain.
8. Personalized Halloween Candy Tags and Labels
Sometimes, the smallest detail makes the biggest difference. Personalized gift tags can turn a simple candy bag into a thoughtful Halloween present, even when the packaging itself is inexpensive.
Cut small tags from cardstock in shapes such as pumpkins, ghosts, bats, stars, or traditional rectangles. Write the recipient’s name, add a short seasonal message, and attach the tag with ribbon or string. You can also print matching labels for a larger batch of gifts if you want every package to have a consistent appearance.
For children’s parties, use playful messages such as “Have a Sweet Halloween” or “A Treat Just for You.” For friends and coworkers, choose a more understated greeting. Handwritten notes can make the gift feel personal, while printed designs save time when preparing many packages.
You can coordinate the tags with your chosen wrapping theme. A ghost bag might have a white tag with black lettering, while a pumpkin package could feature orange cardstock and a green ribbon. Matching the colors helps the finished gift look intentional.
If you want to make the activity more engaging for children, prepare blank tags and let them decorate their own. Provide crayons, washable markers, and Halloween stickers, then allow each child to create a design for a friend or family member. Keep small craft materials supervised around younger children.
9. Halloween Treat Bags with a Personalized Activity Gift
Candy is a classic Halloween favorite, but combining sweets with a small activity can make a gift feel more memorable. This approach works well for children who enjoy drawing, coloring, and imaginative play, particularly when you want to offer something beyond sugary treats.
Choose a medium-sized Halloween gift bag and fill it with individually wrapped candy, a small coloring activity, and a personalized note. Use orange tissue paper, black ribbon, or a themed gift tag to tie the contents together. Keep the candy and activity materials separated so that crayons, paper, and other craft supplies do not come into direct contact with unwrapped food.
For a space-themed surprise, consider the Snoozle Star Gazers Coloring Book: Little Astronauts. Its astronaut and space theme can add a creative element to a Halloween gift bag, especially for children who enjoy coloring and exploring imaginative worlds. Pair it with individually wrapped candy and a small note inviting the recipient to enjoy a sweet treat before starting a coloring adventure.

You can adapt this idea to suit different ages and interests. Younger children might enjoy simple coloring activities, while older children may prefer more detailed illustrations or creative challenges. Choose activity materials that are appropriate for the recipient and avoid adding too many items that make the gift bag bulky.
A candy-and-activity package is also useful for classroom celebrations and family gatherings because it offers an alternative to giving candy alone. The sweets provide an immediate treat, while the coloring activity gives children something enjoyable to do after the celebration.
10. Last-Minute Halloween Candy Wrapping Ideas
If Halloween is approaching and you have little time to prepare, there are still plenty of ways to make candy gifts look festive. The key is to use simple materials, repeat a small number of designs, and focus on one or two decorative details rather than attempting elaborate crafts.
Clear food-safe bags filled with individually wrapped candy are among the quickest options. Close each bag with orange ribbon, attach a small black tag, and add a simple ghost or pumpkin sticker to the outside. You can prepare several bags in a short amount of time while keeping the design consistent.
Another quick option is to wrap candy bars in black or orange paper and secure them with a strip of contrasting ribbon. Leave the original candy wrapper intact and use the paper only as an outer decoration. This approach works well for coworkers, neighbors, and party guests.
Small kraft bags are equally practical. Draw a simple bat, spider, or smiling pumpkin on the front, add the candy, and fold the top closed. If you are making gifts for children, personalize each bag with a name to make distribution easier during a busy event.
For a coordinated look, choose one color combination and use it throughout all your packages. Black and orange are traditional, while purple and green can create a playful alternative. A consistent color scheme makes even quick, inexpensive wrapping look planned and attractive.
Tips for Safe and Attractive Halloween Candy Packaging
Before preparing your Halloween candy gifts, consider the recipients and how the packages will be handled. Keep candy in its original wrapper whenever possible, and use food-safe packaging for any sweets that will be exposed. Avoid placing unwrapped candy directly against tissue paper, decorative glitter, painted surfaces, or materials that are not intended for food contact.
If you are preparing treats for a classroom or children’s party, keep ingredient labels visible whenever possible and consider common allergens. Do not assume that a candy is suitable for everyone simply because it is individually wrapped. When distributing gifts to a group, ask about relevant food restrictions or choose clearly labeled treats.
Choose packaging that suits the size and weight of the contents. Lightweight paper bags work for small candy portions, while sturdy boxes are better for heavier selections. Secure ribbons and tags carefully, but avoid adding loose small decorations to packages intended for very young children.
Finally, prepare a small test package before making a large batch. Check whether the bag closes properly, whether the decorations remain attached, and whether the candy fits comfortably. This simple step can save time and prevent last-minute problems when preparing gifts for a party or event.
Make Halloween Candy Gifts More Memorable
Creative Halloween candy gift wrapping is an easy way to make seasonal treats feel more personal. Whether you choose ghost-shaped bags, miniature pumpkin packages, playful monster wrappers, elegant gift boxes, or a colorful candy bouquet, the right presentation can transform ordinary sweets into thoughtful Halloween surprises.
You do not need expensive supplies or complicated crafting techniques to achieve an appealing result. Simple paper bags, ribbons, cardstock, stickers, and reusable containers can provide everything you need to create attractive packages for children, friends, family members, and coworkers. Personal touches such as handwritten tags, coordinated colors, and small activity gifts can make each package feel even more special.
The most successful Halloween candy packaging combines creativity with practicality. Keep the sweets protected, choose decorations that suit the recipient, and select a design that fits your available time and budget. With these ideas, you can prepare festive candy gifts that look delightful on a party table, make trick-or-treating more exciting, and leave guests with a sweet reminder of Halloween long after the celebration ends.